
A re you wondering how to make a calendar in WordPress? If the answer is yes, you’re in the right place. We’ll show you how to create a calendar for your blog so that you can promote your events to readers.
When you start your own blog, writing content is only the first step. As your blog grows, you can organize virtual or in-person events to increase your readership, generate leads, and make money.
For example, you can hold blogger meetups, webinars, online classes, and more.
To promote your upcoming events and boost attendance, you can display an events calendar on your blog.
In this tutorial, we’ll show you how to make a calendar in WordPress, step-by-step, using the best events calendar plugin.
Let’s get started!
In This Guide:
The Best Event Calendar Plugin for WordPress
Sugar Calendar is the best event calendar and booking plugin for WordPress. It’s simple, lightweight, and easy to use.
The user-friendly interface lets you quickly create, edit, manage, and display multiple calendars, without any hassle.
You can make monthly, weekly, or daily calendars for a wide variety of events including webinars, online courses, live-stream events, art exhibits, film screenings, church sermons, and much more.
With Sugar Calendar, you can:
- Filter events by category
- Create color-coded calendars
- Add event details like name, location, start and end times, etc.
- Create single or multi-day events
- Schedule recurring events
- Add images and videos to your calendar
- Assign specific time zones to events
- And much more
Sugar Calendar integrates with third-party services like Google Calendar and iCal to sync events with your WordPress calendar.
It also integrates with popular form builders like WPForms, Gravity Forms, and Ninja Forms, so that you can add event registration forms.
Plus, with the Event Ticketing addon, you can sell tickets to your events through Stripe, right from your blog.
Check out this list of the best WordPress calendar plugins to learn more about Sugar Calendar and how it stacks up against other options.
Now that you’re more familiar with Sugar Calendar, let’s dive into the tutorial…
How to Make a Calendar in WordPress with Sugar Calendar
Simply follow the steps below to easily make an events calendar for your WordPress blog.
Step 1: Install the Sugar Calendar Plugin
First, you need to download the Sugar Calendar plugin.
To do that, go to the Sugar Calendar website. Then, click on the Let’s Get Started button, choose your pricing plan, and follow the checkout process to purchase the plugin.
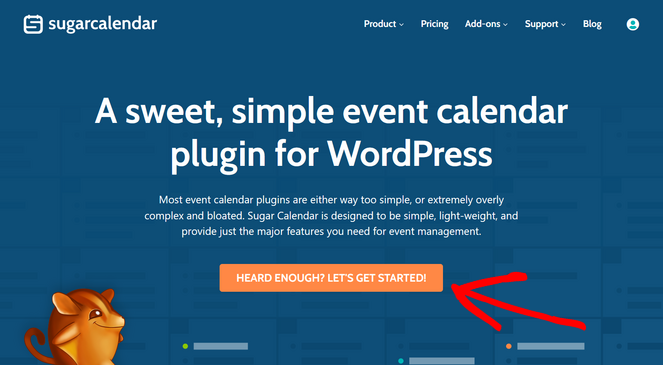
Sugar Calendar also offers a free calendar plugin. But for this tutorial, we’ll be using the premium version that comes with advanced features.
Next, you need to install and activate the Sugar Calendar plugin on your WordPress site.
If you need help, follow our guide on how to install a WordPress plugin for step-by-step instructions.
Once the plugin is activated, go to the Calendar » Settings page in your WordPress admin menu. Here, you need to enter the license key if you’re using the pro version of Sugar Calendar. You can find this in the account area on the Sugar Calendar website.
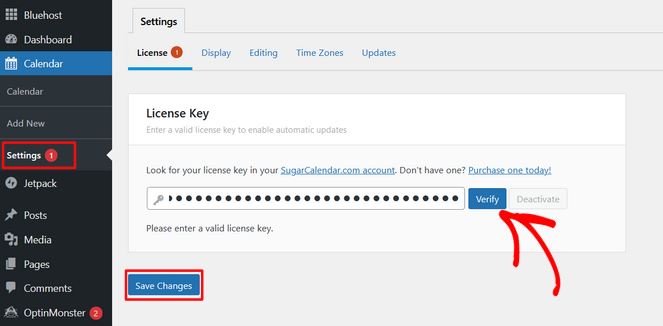
After entering your license key, click on the Verify button.
Then, click the Save Changes button to make sure your license key is saved.
Now you’re ready to make your events calendar!
Step 2: Create a New Calendar
To get started, click on Calendar in the Calendar menu from your WordPress admin sidebar. This will open up a page that has two main sections: Calendars and Events.
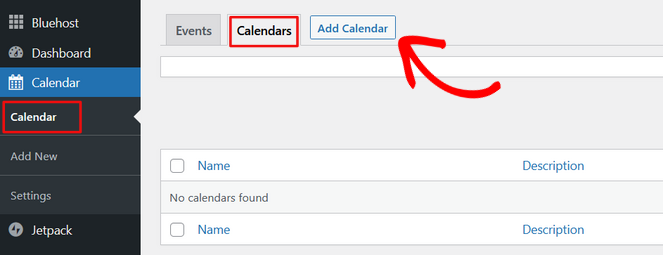
Click on the Calendar tab and then hit the Add Calendar button to create a new calendar.
Now, a popup box will appear where you can begin to customize your calendar. You can enter a name, a slug (the URL-friendly version of the name), and a description.
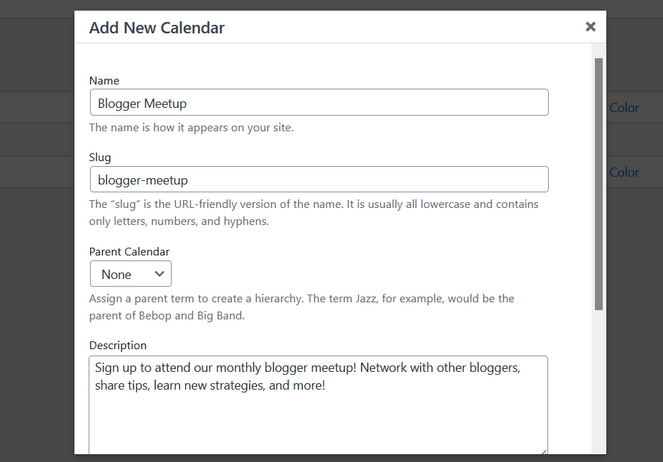
When you scroll down further, there’s also an option to select a custom color for your calendar.
This is helpful if you’re planning on creating multiple calendars and want to be able to quickly identify them. If you’re only making one calendar, you don’t need to select a color.
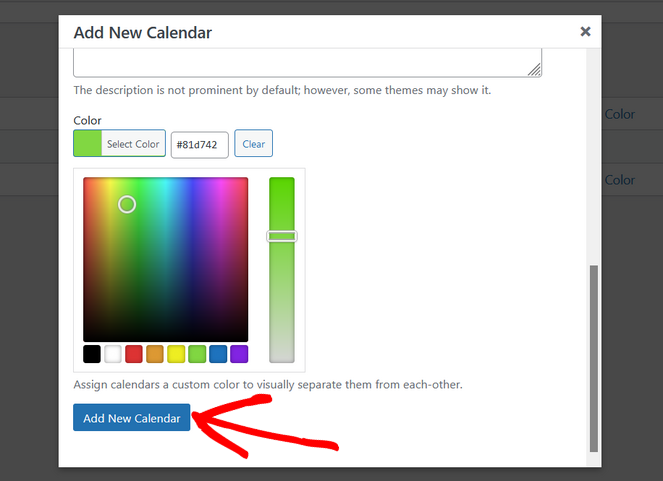
When you’re finished, click on the Add New Calendar button to save your changes.
Now that your calendar is created, it’s time to add events to it…
Step 3: Add Your Events to the Calendar
To add a new event to your calendar, click on the Events tab and click on the Add Event button.
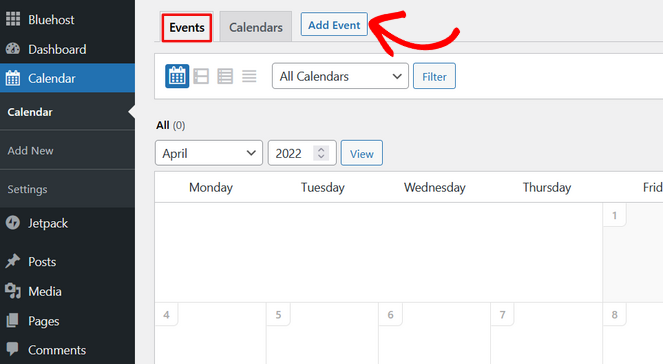
This will open up the event editor where you can add all of the details about your event.
You can start by adding a name for your event at the top of the screen.
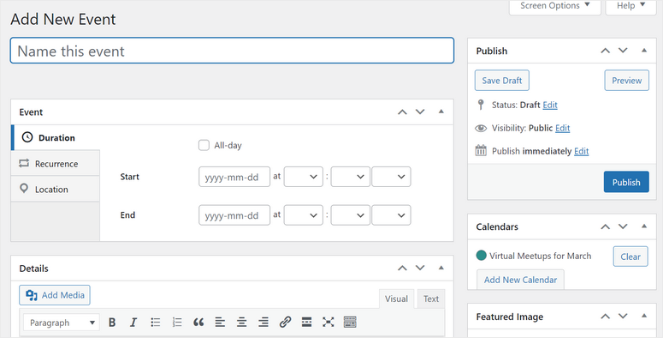
Below the event name, you can select the date for your event, either a single day or multiple days, and set the start and end times.
You can also check the All-day option for all-day events like holidays or birthdays.
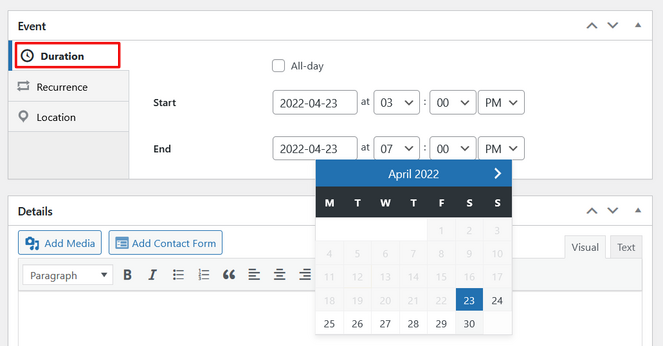
If you want your event to repeat every week or month, then click on the Recurrence tab. Simply select how often you want the event to repeat (Daily, Weekly, Monthly, or Yearly) and then choose an end date or leave the default option ‘Never.’

There’s also a Location tab where you can enter information about the event location if you want. For in-person events, you can write the address of the venue and for online events, you can add a webinar link or Zoom invite.
Next, fill out the Details section with additional information about your event. This is your opportunity to get people excited about the event and encourage them to attend.
To make your event even more appealing, you can also click the Add Media button to include images and videos.
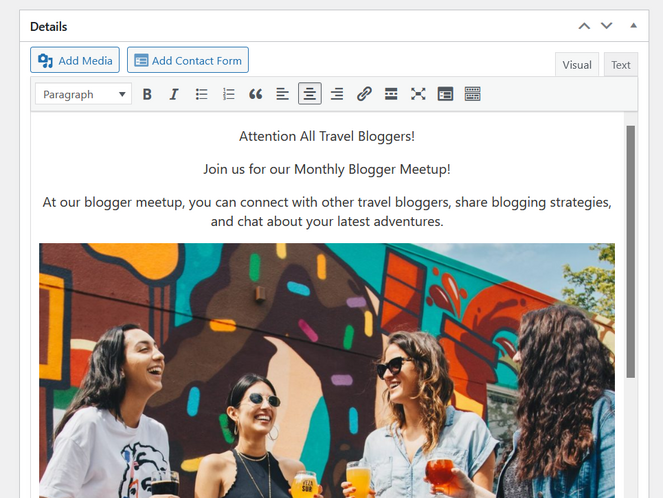
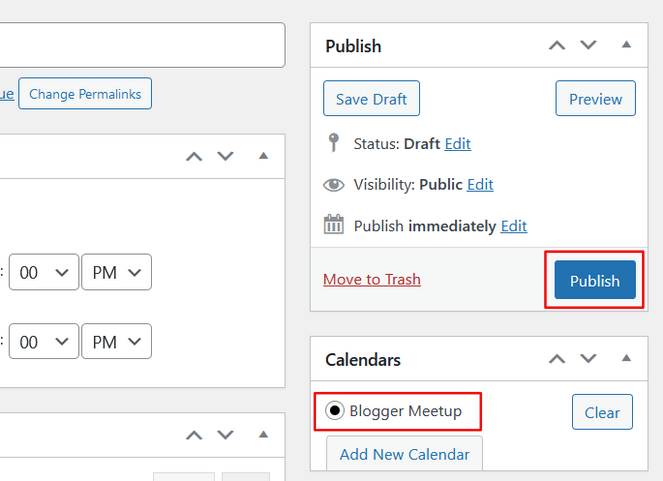
When you’re finished adding your event details, look to the right side of the screen and select which calendar you want to add this event onto.
Then, click on the Publish button to add the event to your calendar.
It’s that simple!
You can repeat this process to add as many events to your calendar as you want.
Step 4: Display the Calendar on Your Website
Now it’s time to add the calendar to your blog!
Sugar Calendar lets you add your calendar to any post or page of your website using shortcodes. It also comes with a widget so that you can display your calendar in the sidebar.
For this tutorial, we’ll show you how to add your calendar to a new page.
Go to Pages » Add New. Enter a title for your page and add the Shortcode block to the page as well.
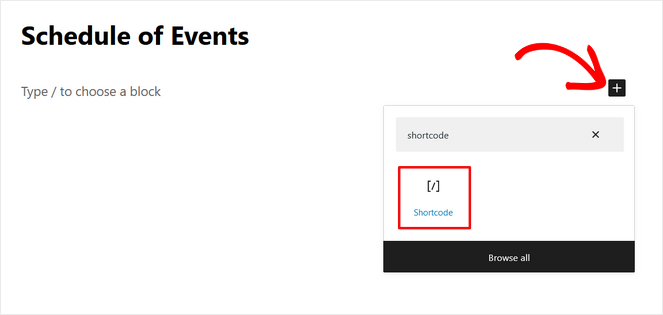
Next, copy the shortcode [[ sc_events_calendar ]] into the shortcode block. Copy the shortcode with singular square brackets instead of double.

Now, you can publish the page. You will then be able to see your events calendar on your site.
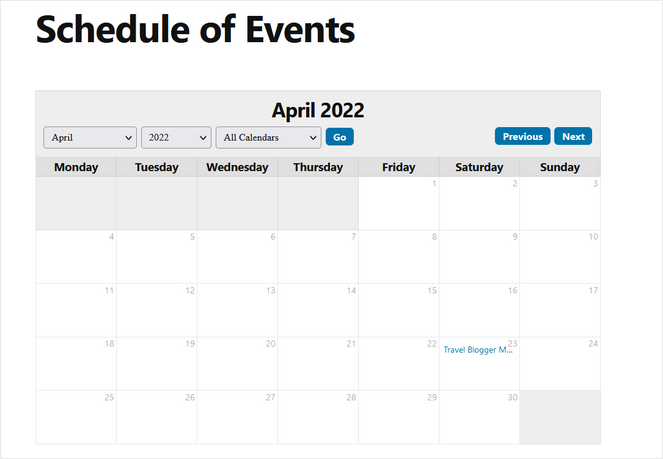
Sugar Calendar automatically adjusts the style, font, and colors of the calendar to match your existing WordPress theme. So, you can be sure that your calendar will look great with the rest of your blog design.
Your website visitors can select which calendar they want to view, along with the month and year, from the dropdown menu at the top. They can also click on any event in your calendar to see more information about the event.

Congratulations, your events calendar is live on your blog!
We hope you enjoyed this post on how to make a calendar in WordPress.
Sugar Calendar is by far the easiest plugin to add a simple event calendar to your blog. But, it also has powerful features and addons to take your calendars to the next level like event ticketing, user-submitted events, and more.
Now you can promote upcoming events to your website visitors and get more event attendees!
If you liked this post, you may also want to check out this list of monetization methods. It shares a number of tactics you can use to make a profit from your blog, including hosting paid webinars.
And don’t forget to sign up for our email newsletter for more helpful blogging tips!


0 Comments
Join in. The comments are closed after 30 days.