
Do you want to know how to install a WordPress plugin? After installing WordPress, one of the first things everyone wants to do is add a plugin to WordPress.
In this guide, we’ll show you three pre-checks, followed by three ways of installing a plugin.
In This Guide:
A quick note before we start: WordPress.com users cannot install plugins unless they upgrade to the Business or Ecommerce plans. Check out this article to see the differences between WordPress.com and WordPress.org.
What is a WordPress Plugin?
WordPress plugins are additional software programs that extend and expand the core functionality of WordPress.
The scope of WordPress plugins is far-ranging. Some are small, simple programs, while others are larger and more intricate.
The scope of WordPress plugins varies significantly. For example, you can find free, simple plugins, such as:
- Classic Editor – lets you switch from the new WordPress block editor to the classic editor.
- WPCode – lets you easily add custom code to your WordPress site – such as in the header and footer sections.
- Really Simple SSL – lets you switch your site to SSL.
And then, on the other hand, there are more advanced premium plugins, such as:
- MonsterInsights – lets you track Google Analytics inside WordPress.
- RafflePress – allows you to create giveaways, contests, and rewards easily.
- All in One SEO – helps optimize your WordPress blog for search engines.
Free plugins can be found in the WordPress Plugin Directory. Whereas premium plugins have to be purchased from the software vendor’s website.
3 Things to Check Before You Install a Plugin
Before you install a plugin on your WordPress blog, there are a few things to check to ensure that you’re choosing the right one.
You can find this information within the WordPress Directory alongside the plugin you want to install. For example, here are the details for the WPForms Drag & Drop Form Builder plugin:
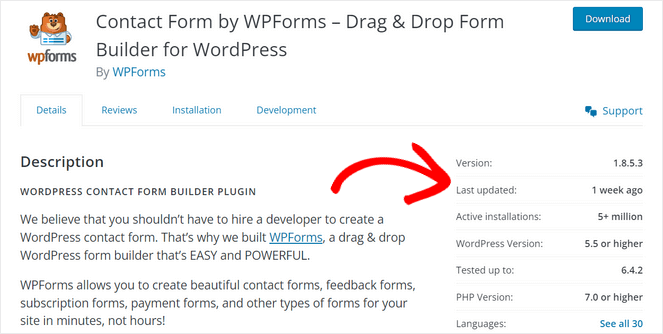
#1 – When was it last updated?
If it’s been more than a few months since the plugin’s last update, it might not be safe to install. Plugins need updating to remain secure and compatible with the latest version of WordPress.
In our example, you can see WPForms was recently updated 1 week ago.
#2 – What version is it compatible with?
Check which version of WordPress the plugin needs to function correctly and whether it matches the version of WordPress you have installed?
In our example, you can see Akismet needs WordPress version 4.0 or higher.
#3 – Does it have good ratings and reviews?
Make sure you read the reviews and ratings to see what people are saying. Sometimes you’ll find information that you may not have considered.
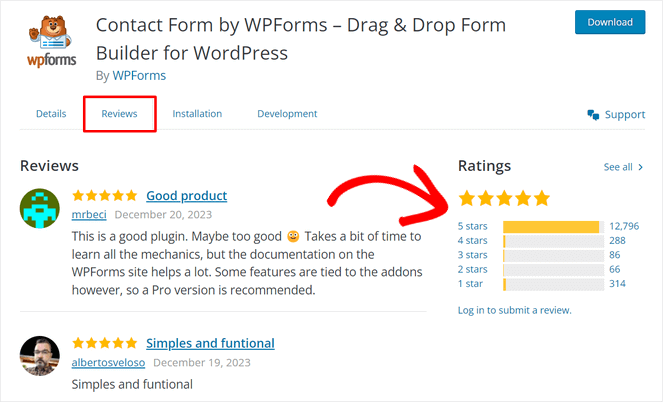
In our example, you can see that WPForms has passed the 12,000 5-star review ratings.
You’ll find most plugins are safe to use, especially the premium versions. But these few pre-checks ensure you don’t install something on your blog that you don’t want.
Option 1 – How to Install a WordPress Plugin via the Admin Dashboard
The easiest way of installing a free WordPress plugin is via your Admin Dashboard. This option connects to the WordPress Plugin Directory, which is restricted to free plugins.
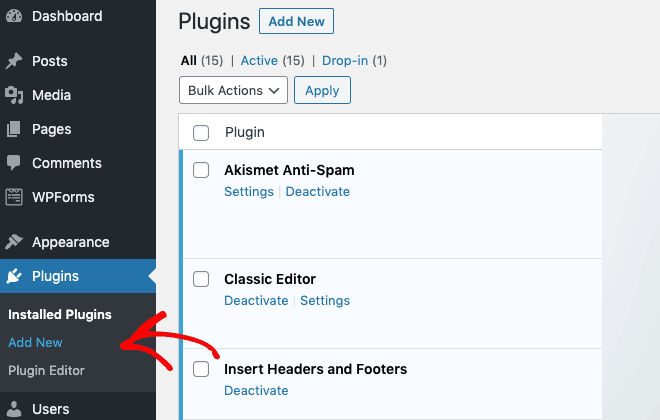
First, go to your WordPress Admin Dashboard and click on Plugins > Add New:
On the next page, you can find a plugin either by entering its name or the functionality you want. For example, you might want a ‘social sharing’ plugin:
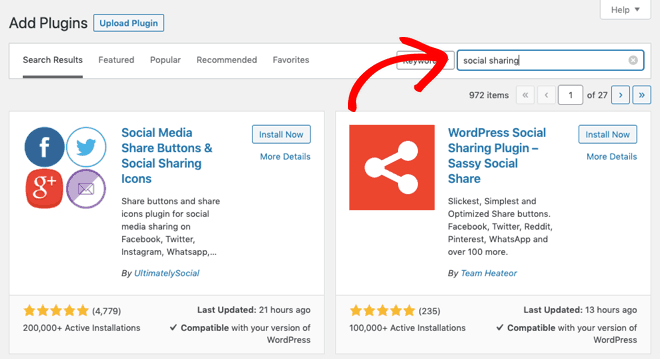
After that, you will see all the relevant plugins listed.
There’s an option to view more details about each plugin if you need to check. When you’ve decided on the plugin you want, click the Install Now button:
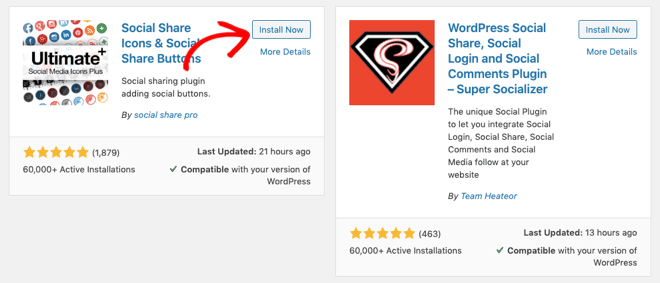
WordPress will now install the plugin for you. Once it’s completed, you’ll see the Install Now button changes to Activate:
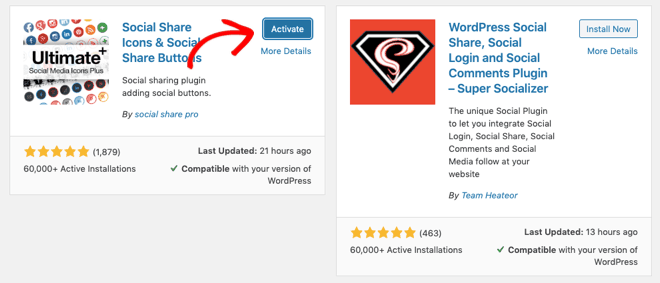
Although the plugin is installed, you have to activate it to make it function, so click on the Activate button.
Now, in your Admin Dashboard, you should see a welcome screen for the new plugin:
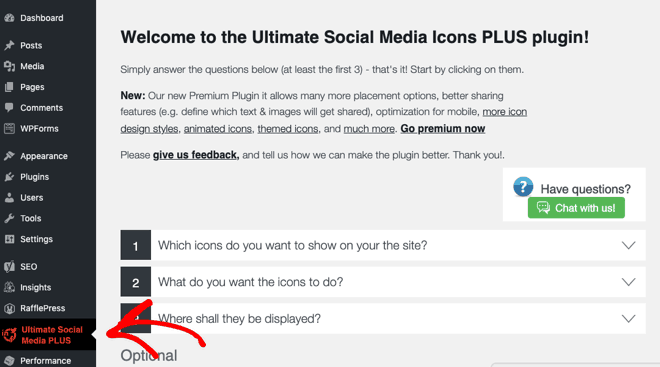
You may have to enter some more details to complete the setup, so follow the on-screen instructions. You’ll see a new menu option for the plugin on the left-hand side.
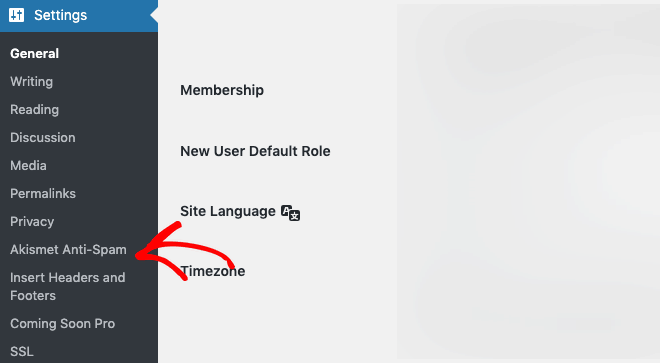
Note: Sometimes, the plugin gets added to an existing menu. For example, you’ll find Akismet in the Settings menu:
And that’s it! You’ve installed and activated a free WordPress plugin.
Option 2 – How to Upload and Install a Premium WordPress Plugin
Premium plugins are not listed in the WordPress Plugin Directory. You’ll most likely purchase a premium plugin from the vendor’s website or a third-party marketplace.
Once you’ve purchased a premium plugin, you download the software in a ZIP file to your computer.
Note: You can also download free plugins from the WordPress Directory and install them using this option. But the first option is the easiest method.
Now, you need to upload your plugin to WordPress.
First, go to your WordPress Admin Dashboard and click on Plugins > Add New:

At the top of the next page, click on the Upload Plugin button:

Next, click on the Choose File button and select the plugin ZIP file you downloaded to your computer previously:

Once you’ve located your file, click on the Install Now button:

WordPress will now upload and install the plugin for you.
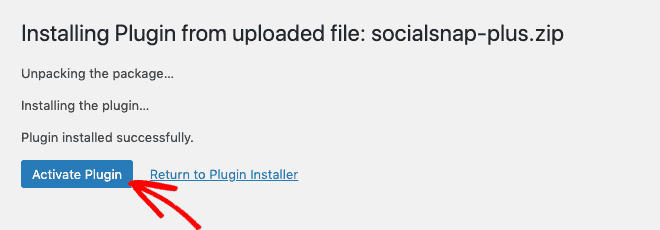
Once it’s completed, you’ll see the success message with an Activate Plugin button or Return to Plugin Installer link. Although the plugin is installed, you have to activate it to make it function, so click the Activate Plugin button:
Now, in your Admin Dashboard, you should see a welcome screen for the new plugin:

You may have to enter some more details, including a license key, to finish the setup, so follow the on-screen instructions. You’ll also find a new option for the plugin in the left-hand side menu.
And that’s it! You’ve installed and activated a premium WordPress plugin.
Option 3 – How to Install a WordPress Plugin Manually
Sometimes it may not be possible to use the previous options, for example when your WordPress hosting provider has file restrictions or doesn’t allow automatic installations. In which case, you’ll need to install your WordPress plugin manually using FTP.
First, you need to download the plugin as a ZIP file to your computer. Then, you need to extract the ZIP file on your computer.
Extracting the ZIP file will create a new folder that you’ll need to upload to your website manually using an FTP client.
For the next step, you’ll need your FTP username and password. Your WordPress hosting provider will be able to provide these details if you don’t have them to hand.
Open the FTP client on your computer and connect to your server using the login credentials provided by your web host.
Once connected, you need to find the path /wp-content/plugins/:
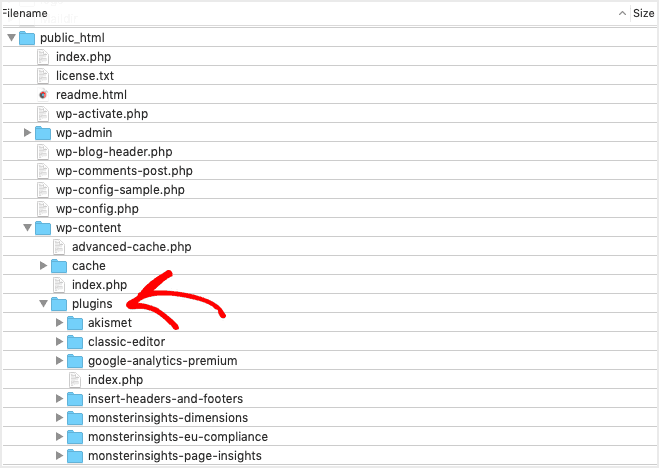
Next, upload the plugin folder you extracted from the ZIP file to the /wp-content/plugins/ folder on your web server:
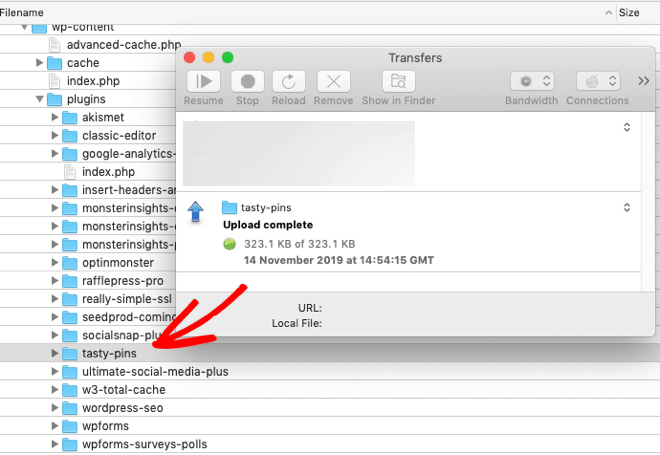
After uploading the plugin folder, you need to check if it installed ok.
In your WordPress Admin Dashboard, click on Plugins in the left-hand menu, and you should see your new plugin successfully installed on the plugins page:
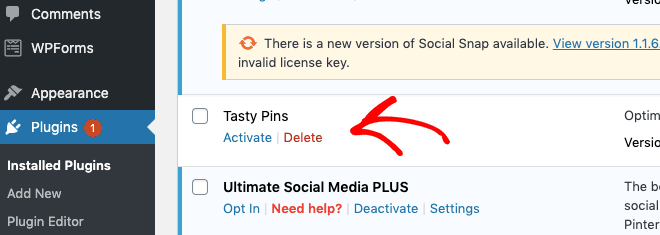
Finally, you need to click on the Activate link below the plugin. Once it’s activated, you may have to enter some more details, including a license key, to finish the setup, so follow the on-screen instructions.
That’s it! You’ve successfully installed your WordPress plugin manually using FTP.
Wrapping Up
Now you know how to install a WordPress plugin using one of the methods described above.
If you’re looking for inspiration, then why not check our review and comparison of the best WordPress plugins to help grow your blog.
Let us know if you have any questions.


Hello Dear,
Thanks for sharing each micro point. which is very relevant.
You’re welcome.
I m Really looking forward to read more. Your site is very helpful for us .. This is one of the awesome post i got the best information through your Post.