A re you wondering how to create an email course? Keep reading! We'll show you exactly how to make a free email course to attract new email subscribers.
When you start a new blog, it can be difficult to get email subscribers. But, have you considered offering a free email course?
A free email course is a series of emails that provides practical tips and information to your visitors on a topic relevant to your blog (i.e. SEO, marketing, photography) without any cost.
By using this strategy, you can easily turn website visitors into email subscribers and even paying customers.
In this tutorial, we’ll walk you through the process of how to create an email course, step-by-step.
In This Guide:
But first, let’s go over what an email course is and how it can help you get more subscribers.
Key Takeaways On How To Create An Email Course
- An email course is a series of lessons delivered via email, often used as a lead magnet to capture email subscribers in exchange for free valuable content.
- Creating a free email course helps build trust with your audience, puts new subscribers in the habit of opening your emails, and can eventually lead to sales of paid products/services.
- Choose an email course topic closely related to your blog’s niche or industry to attract your existing readers as well as new potential customers.
- Plan out your course with an outline breaking it into logical, actionable steps towards a specific goal for your students.
- Use an email marketing service like Constant Contact to automate and schedule the delivery of your email lessons.
- Promote your new email course opt-in using a tool like OptinMonster to create high-converting campaigns like exit-intent popups and floating bars.
- Don’t make your email course an overt sales pitch – focus on providing valuable education first before promoting any paid offerings towards the end.
What is an Email Course?
An email course is a series of lessons that are delivered via email. An email course is often used as a lead magnet, which is a digital marketing term used for an item that’s given away for free in exchange for a user’s email address.
Once a user has signed up, these email lessons are automatically sent to them over a set period of time. This means that you only have to set up your email course once. After that, it will run on autopilot, which saves you a ton of time.
Using email courses to increase your subscribers is effective because:
- Email courses are valuable: If there’s something helpful that you can teach your audience, they’ll be more than willing to sign up for your free course in exchange for your valuable knowledge.
- Email courses build trust: With an email course, users will receive regular communication from you over a period of time. This not only shows that you’re reliable and builds trust, but it also puts your new subscribers in the habit of opening your emails.
- Email courses are easy to create: Instead of producing a complete online video course with recorded lessons and quizzes, just create simple email lessons in the beginning. This makes for a quick and easy method of boosting subscribers.
- Email courses are low cost: As a blogger, you likely already have an email service provider and don’t need to invest in an additional online course creation platform. This allows you to test out different email courses and see what converts best, without having to spend more money.
You can also use free email courses to turn subscribers into customers. For example, if you are selling a product or service that relates to the topic you’re teaching, you can invite subscribers to make a purchase at the end of the course.
Or, you can encourage students from your free email course to buy a premium online course to continue their learning. If you’re interested in creating a paid course, follow this tutorial on how to create an online course with WordPress.
Now that you know the benefits of email courses, we’ll show you how to create one.
Step 1. Choose a Topic for Your Email Course
First, you need to come up with the right email course topic for your target audience. After all, if no one is interested in what your email course is about, no one’s going to sign up.
We always recommend that you pick a topic related to your blogging niche or industry.
This is because you’ll get more signups from your existing readers if the topic is related to something they’re already reading about. Plus, it can attract new loyal fans to your blog and encourage potential customers to purchase from you.
To give you a better idea, let’s take a look at some email course examples:
Love and Lemons
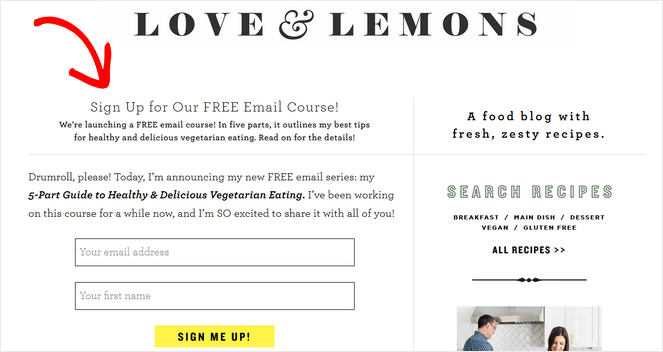
Love and Lemons, a food blog that shares fresh recipes, created a free email course that teaches people how to eat deliciously and healthily on a vegetarian diet.
After taking the free email course, users can choose to purchase a cookbook or a meal planner from the online shop.
Half Banked
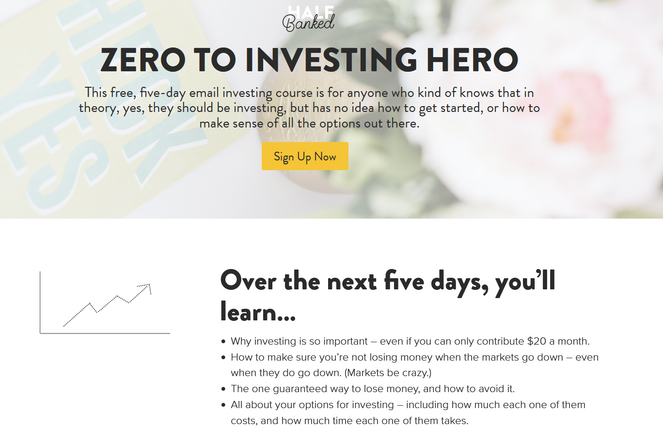
Half Banked, a personal finance blog for Millennials, offers its website visitors a free email course that teaches the basics of investing.
Subscribers to the email course are likely to become loyal readers who will check out Half Banked’s other helpful blog posts, resources, affiliate links, and products.
Elna Cain
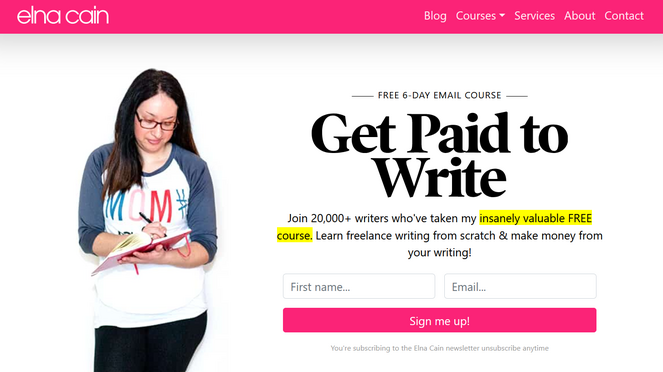
Elna Cain is a popular freelance blogger and writer. In her free 6-day email course, she teaches others how they can make money with freelance writing.
After that, users have the option to purchase premium online courses from Elna, which cost between $95 – $195 each.
As you can see from these examples, these blogs all chose relevant email course topics to help them easily turn visitors into subscribers, and subscribers into customers.
Step 2. Plan Your Email Course Content
Before you dive into writing your email course content, let’s start with an outline first.
Here’s an example of a good email course outline from the Millennial Money blog:
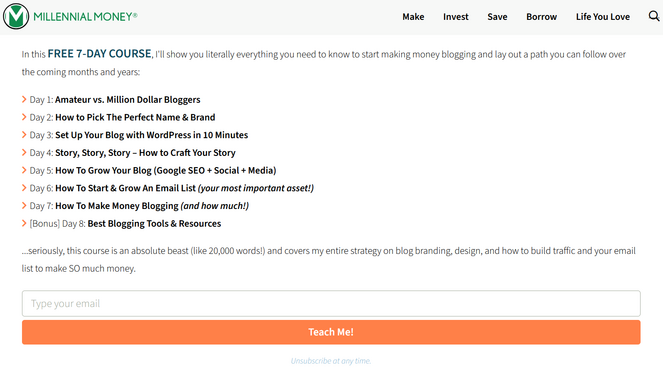
This 7-day email course teaches readers how to start their own blog. The email sequence starts with an introduction email, and each email after that goes step-by-step through the process of starting a blog. There’s even a bonus 8th-day email that shares the best blogging tools and resources.
When planning your email course content, think about what your readers want to accomplish by the end of the course, and what steps they need to take to get there. This will help you create an email course outline that’s actionable and easy for readers to follow.
Once you’ve built an outline, it’s time to start writing. Here are some tips to keep in mind:
- Pick A Good Email Subject Line: An eye-catching email subject line is one of the most important elements of a successful email course because it’s what gets people to open your emails. We recommend putting the lesson number and a teaser of the lesson content in the subject line, such as ‘Lesson 1: How to Pick the Perfect Blog Name.’
- Keep Your Emails Short: You don’t need to share every single thing you know about a topic in your email course. Instead, keep your emails short. This way, your subscribers are more likely to read your entire lesson and learn the key takeaways.
- Make Your Emails Actionable: As readers are taking your email course, they should feel like they’re making progress toward their goal. You can achieve this by making your emails actionable. Tell readers exactly what to do next or have them do ‘homework’ like responding to a journal prompt or filling out a meal plan.
- Don’t Be Too Salesy: Your entire email course shouldn’t be a sales pitch for your product or service. Keep the focus on educating your readers and don’t do any selling until the last email of your course.
When you’re finished creating your email course content, it’s time to automate it.
Step 3. Automate Your Email Course
To create an automated email course, you need an email marketing provider. As a blogger, you may already have one. But if not, we recommend Constant Contact.
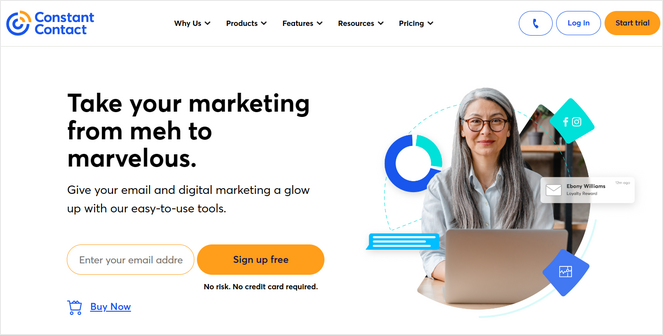
Constant Contact is one of the best email marketing services in the market. It’s reliable, easy-to-use, and it comes with a drag-and-drop email builder and tons of pre-made email templates. Plus, there’s a free trial that allows you to send up to 100 emails.
If you’re looking for an alternative, we also recommend Brevo (formerly Sendinblue). It offers a free plan that allows you to send up to 300 emails per day.
For this tutorial, we’ll be using Constant Contact as our email service provider.
1. To get started, create a Constant Contact account, or log into your existing account.
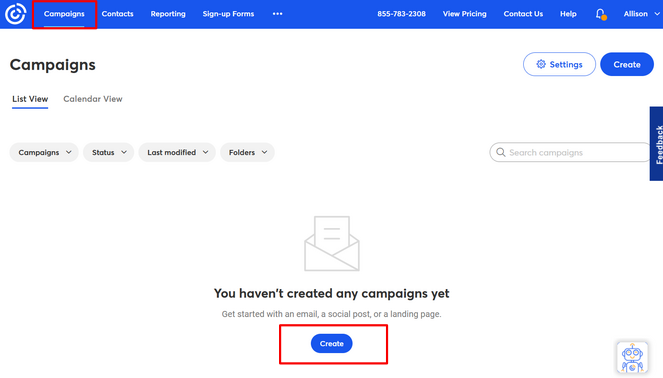
2. From the Constant Contact dashboard, click on the Campaigns tab and then on the Create button.
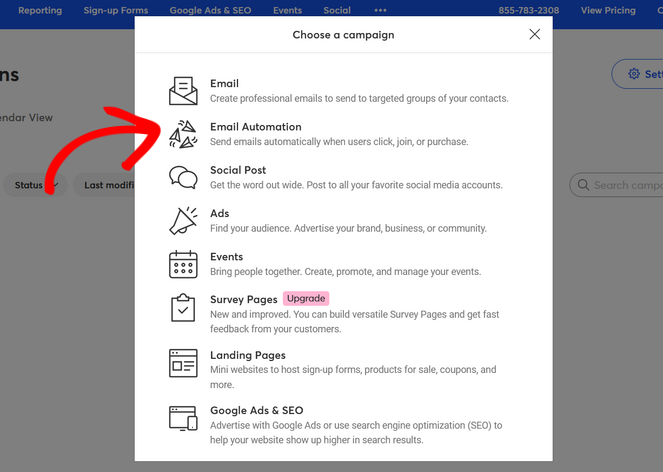
3. Next, you’ll be prompted to choose the type of campaign you want to create. Choose the Email Automation option from the list.
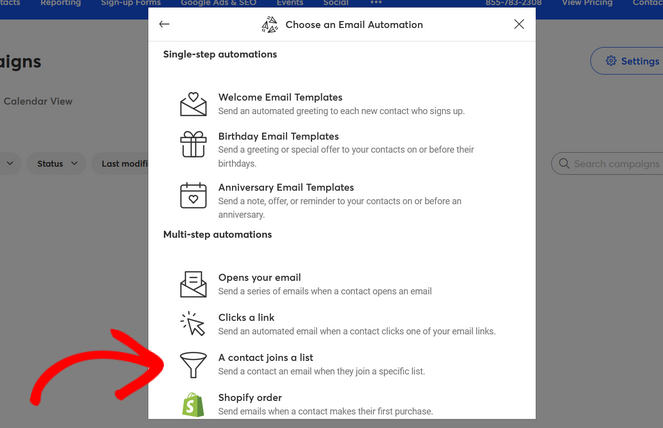
4. Next, select the A contact joins a list option underneath the Multi-step automation section.
5. After that, you’ll be asked to give your automated email sequence a name. The name you choose won’t be visible to subscribers, so you can choose any name that helps you remember what the campaign is for.
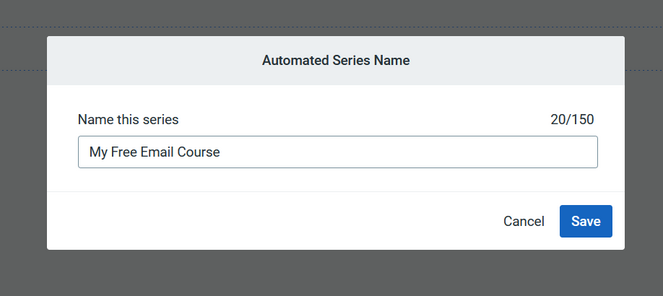
Click the Save button to continue.
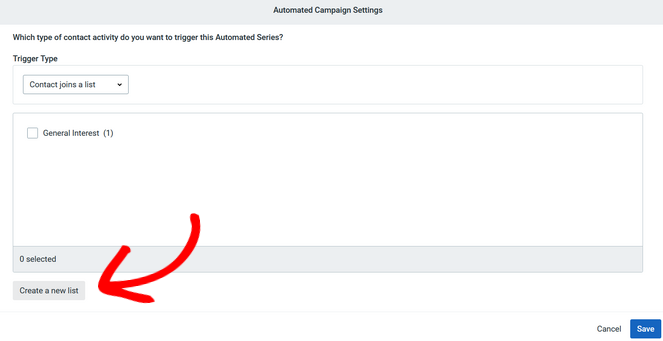
6. Next, you’ll be asked to select a contact list that triggers the automated email series. When creating an email course, we recommend creating a new list. Click the Create a new list button.
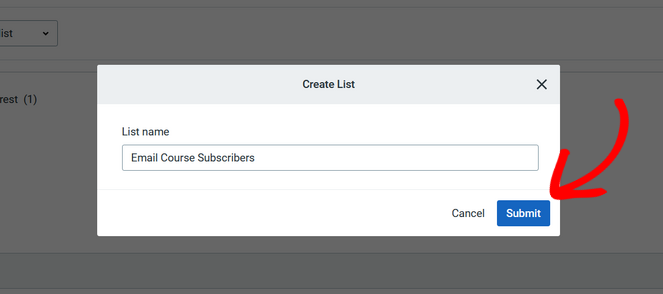
7. Give your new list a name, like ‘Email Course Subscribers,’ and click the Submit button to continue.
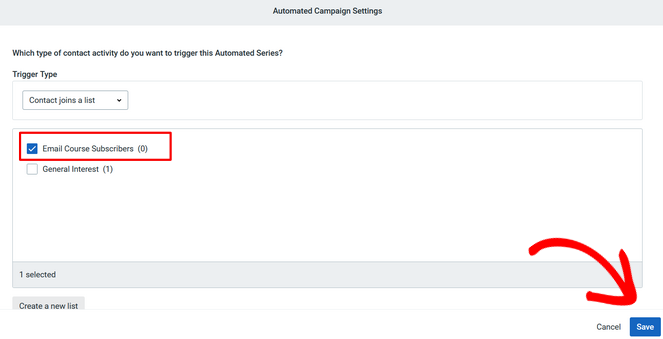
8. Now, you can see that your new contact list is selected in the Automated Campaign Settings window. Click the Save button to move on to the next step.
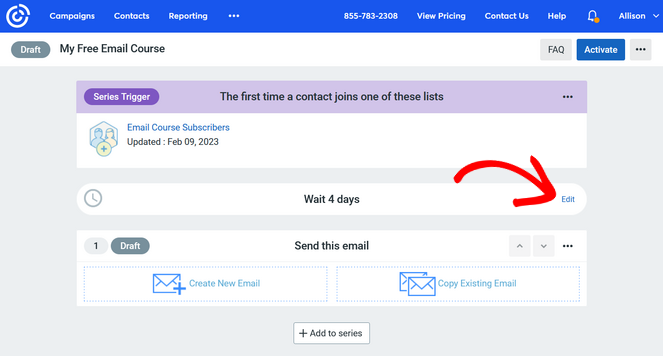
9. After that, you’ll be redirected to the visual automation builder. Constant Contact has added some default content here, but you can edit it.
First, you need to make sure your welcome / introduction email is sent immediately after a user signs up. To configure those settings, click on the Edit button next to the Wait option.
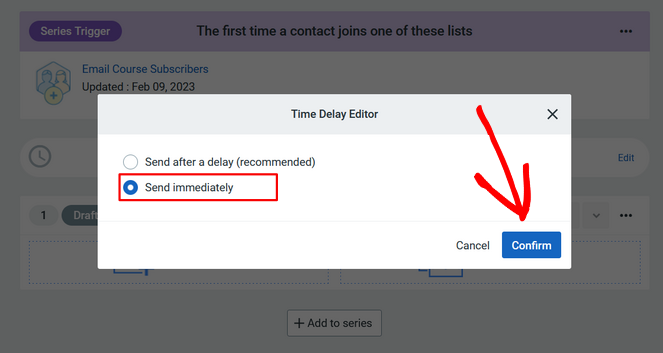
Simply select the Send Immediately option and click Confirm. Remember, this is only for the first email in your email series.
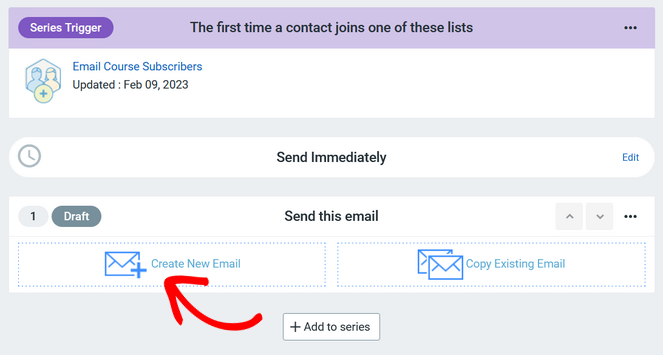
Now, you can start creating the first email of your email course.
10. Click on the Create New Email button under the ‘Send this email’ section.
Constant Contact offers a library of ready-made templates you can use to quickly give your emails a professional design. Or, you can choose a blank template to start from scratch.
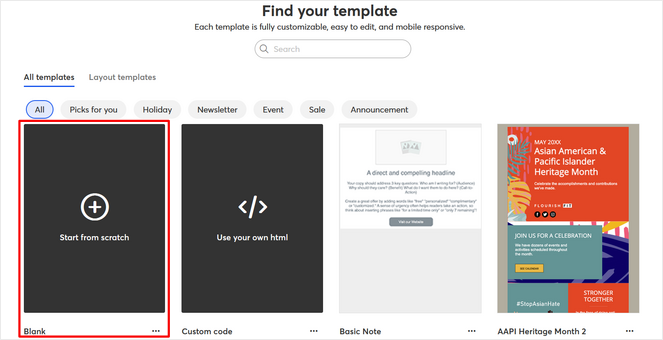
To keep it simple for this tutorial, click on the Blank template to select it.
11. After that, you’ll be taken to the campaign builder where you can start creating the first email of your course.
On the left side of the screen, you can see ready-made blocks that you can use to build your email. And on the right side, you’ll see a preview of how your email looks.
Simply drag blocks such as Text, Image, Heading, Button, Video, Social Share, Featured Article, Coupon, and more, and drop them into place on your blank email template.
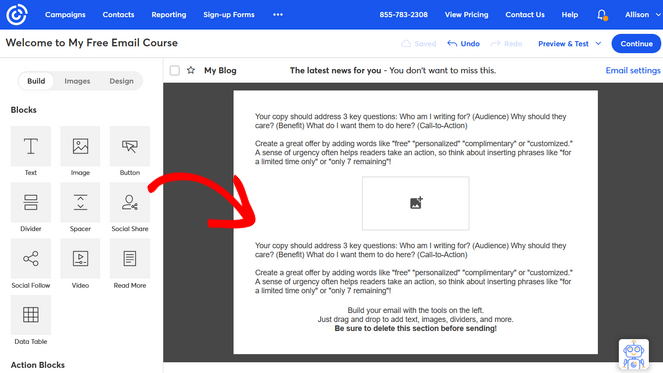
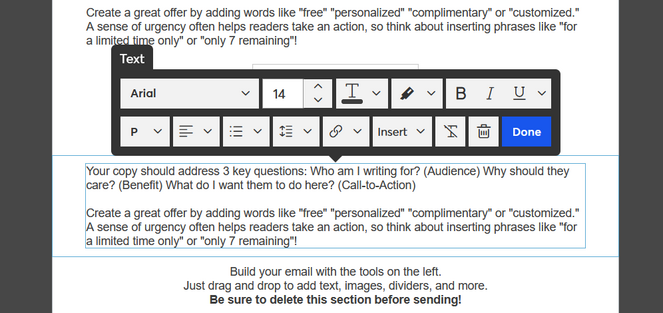
In the example above, we’ve added some Text blocks to our email. To edit the default text, simply click inside the text box.
You can also adjust the formatting if needed.
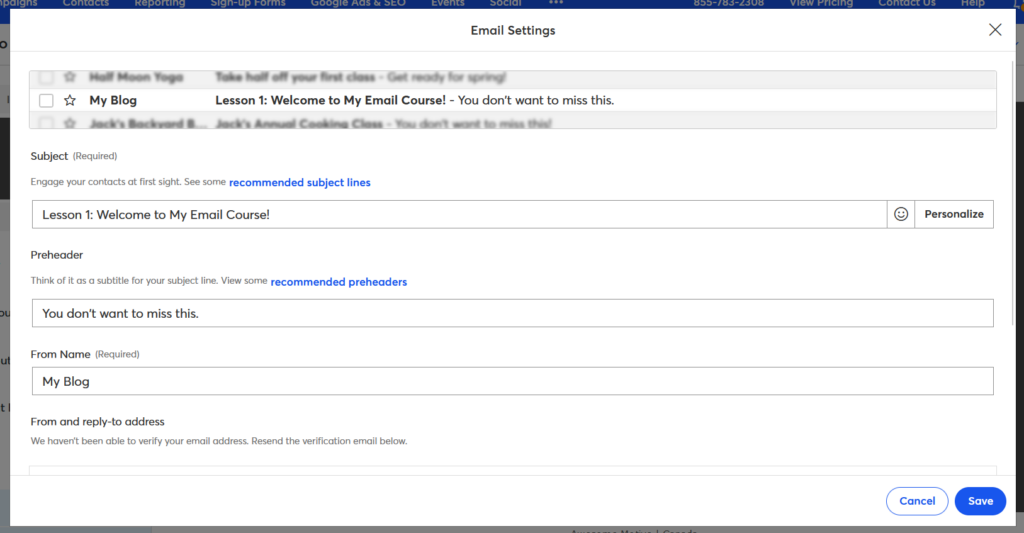
You also need to fill in the email subject line and sender’s name. To do that, click on the Email Settings bar at the top of the builder.
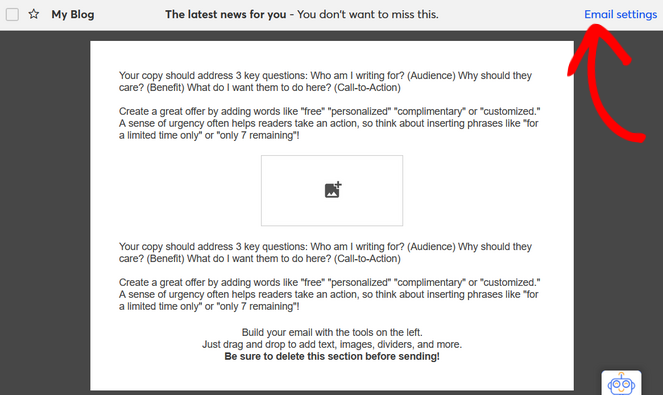
Here, you can type your subject line and sender’s name into the fields provided. You also have the option to add a preheader, which is like a teaser that appears next to your subject line.
12. Click Save to continue.
13. When you’re finished creating the first email of your free course, click the Continue button in the email builder to go back to the automation builder.
14. Now, it’s time to create the second email of your email course. To do that, simply click on the Add to series button.
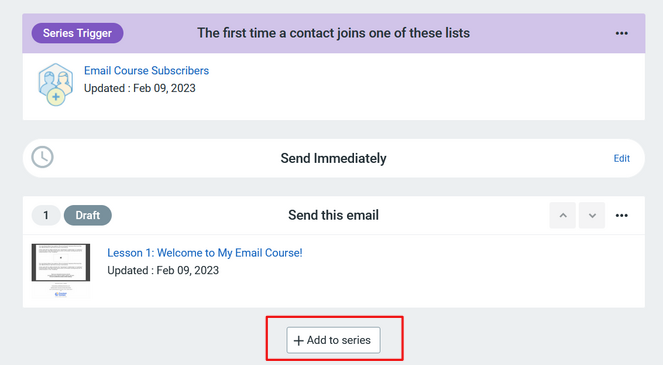
Constant Contact will automatically place a wait step on the next email, which is great because we don’t want to send the second email right away.
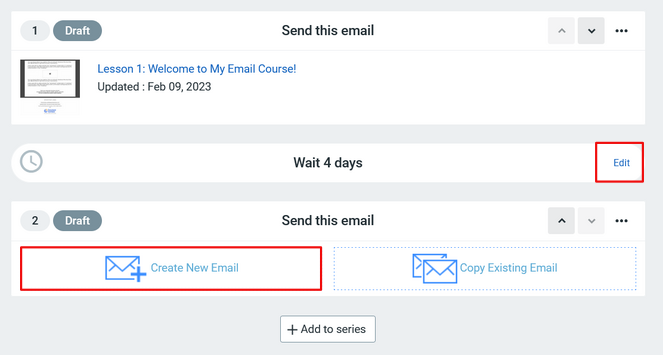
If you want to change the wait step to 2 or 3 days, to keep up the pace of your email course, simply click the Edit button.
After that, click the Create New Email button to build the second email of your email course.
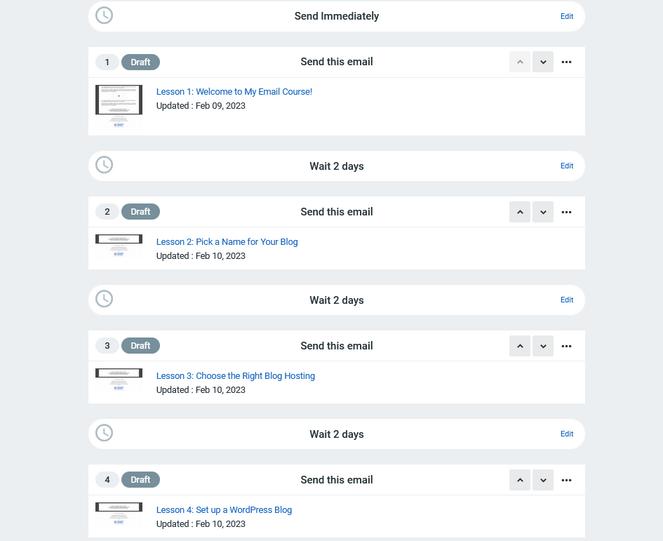
15. Repeat the process until you’ve created all of the email lessons for your course.
When you’re finished, your automation should look something like this:
16. After checking over your work and making sure everything looks okay, you can click the Activate button.

You can also send yourself test emails to check if the formatting and elements are all in place. Constant Contact also lets you build attractive landing pages to convert your subscribers into customers when you start sending out promotional emails.
Now that your email course is up and ready, it’s time to get some signups. Let’s learn how to do so below.
Step 4. Promote Your Email Course
After you’ve created your email course, you need to let your website visitors know about it so they can sign up.
And one of the best ways to do that is with OptinMonster.
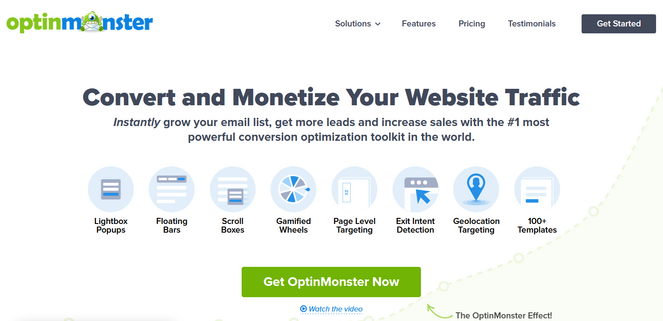
OptinMonster is the best email capture tool in the market, used by over 1,213,437+ website owners. With the drag-and-drop builder and pre-made templates, you can easily create beautiful marketing campaigns to promote your email course and get more subscribers.
There are many campaign types to choose from and powerful triggers that allow you to show your offers to the right people at exactly the right time.
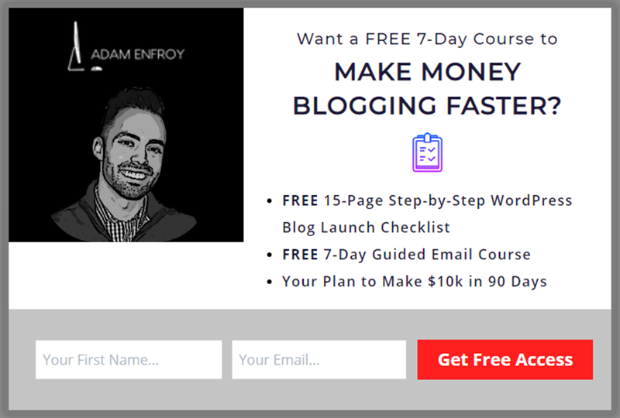
For example, you can make an Exit-Intent popup that tracks when a user is about to leave your site. Before they go, the popup will appear and encourage them to sign up for your free email course.
Adam Enfroy used the OptinMonster campaign above to grow his email list by over 11,000 subscribers in just one year!
Or, you can create a floating bar campaign. This option is less obtrusive, so you can display it at all times to remind website visitors about your email course.
OptinMonster seamlessly integrates with Constant Contact and many other popular email marketing services like ConvertKit, Brevo, Mailchimp, and more.
This makes it easy to connect your OptinMonster campaigns with the email course you just created, and automate the entire process.
For step-by-step instructions, you can follow this tutorial on how to create a custom Constant Contact popup that converts.
OptinMonster also comes with features like countdown timers, coupon wheel optins, geo-location targeting, scroll triggers, page-level targeting, and more. For more details, check out our OptinMonster review.
That’s it! We hope this tutorial helped you learn how to create an email course to get more subscribers.
If you enjoyed this article, you may also want to check out our guide on how to make money with email marketing.
And don’t forget to sign up for our email newsletter for more helpful blogging tips!



This was just amazing! It made my day. Loved it very muc♥️